

1. Dolma
- ½ pound ground lamb
- ½ cup uncooked long grain rice
- ¼ cup olive oil
- 2 tablespoons chopped fresh mint
- 1 tablespoon dried currants
- 1 tablespoon pine nuts
- 1 ½ teaspoons kosher salt
- 1 teaspoon ground black pepper
- ½ teaspoon ground cumin
- ¼ teaspoon ground cinnamon
- ¼ teaspoon dried oregano
- 1 large egg
- 1 (16 ounce) jar grape leaves
- 1 tablespoon olive oil
- juice of one lemon
- 4 cups hot chicken broth
- 2 teaspoons olive oil, or as desired
- Step 1
Place ground lamb, rice, 1/4 cups olive oil, mint, currants, pine nuts, salt, pepper, cumin, cinnamon, oregano, and egg in a bowl. Mix together thoroughly with a fork. Cover and refrigerate until ready to use.
- Step 2
Gently unroll and separate grape leaves. Rinse in cold water to remove brine. Drain. Reserve broken or less-than-perfect leaves to line pot.
- Step 3
Place grape leaves on work surface with smooth side down (ribs of leaves up). Place a rounded tablespoon of lamb-rice filling near bottom-center of grape leaf. Fold bottom sections of leaf over mixture, fold over sides, and roll toward the top of the leaf into a firm cylinder. Don't roll too tightly or leaves may burst when rice cooks.
- Step 4
Drizzle 1 tablespoon olive oil into pot; line bottom of pot with 1 or 2 layers of reserved grape leaves. Place dolmas in pot by arranging them along the sides, then working toward the center to cover the bottom. Leave enough space between dolmas to allow for expansion, but close enough to hold their shapes when cooking. If necessary, stack another layer on top of the first so they all fit. Pour in lemon juice and 2 teaspoons olive oil.
- Step 5
Invert a small plate and then a larger plate over the dolmas to weigh them down while they cook and prevent them from shifting. Pour in hot chicken broth. Bring to a simmer, uncovered, over medium-high heat. As soon as liquid is heated through and starting to bubble (2 to 4 minutes), reduce heat to low, cover the pot, and cook 35 minutes. Remove plates and check for doneness. Dolmas should look a bit puffed up, and a fork should pierce them easily. If not quite done, continue cooking without the weights: cover the pot and simmer until rice is tender, 10 to 15 minutes longer.
- Step 6
Serve warm or chilled. Garnish with curls of lemon zest, if desired.

2. Beef Chebureki
Ingredients
- 2 1/2 cups flour
- 1/2 cup water
- 4 tablespoons olive oil
- 1/2 pound ground beef
- 1/2 teaspoon sugar (white)
- 1/2 onion (medium, finely chopped)
- 6 tablespoons water
- 1 teaspoon parsley flakes (or finely chopped fresh parsley)
- avocado oil (for frying)
- salt (to taste)
- pepper (to taste)
Instructions
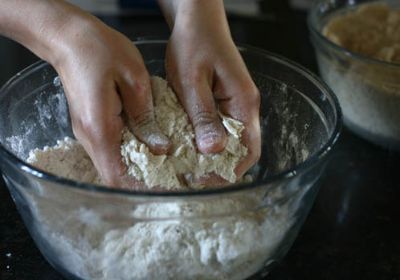
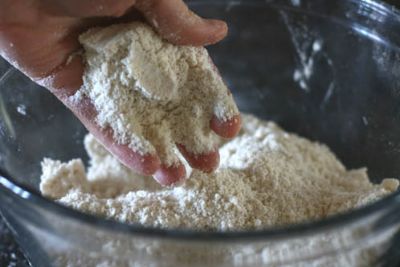
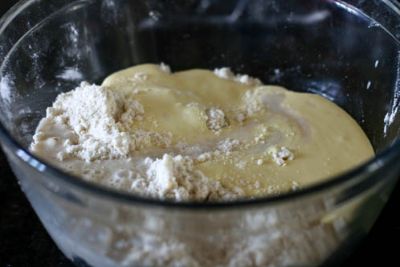
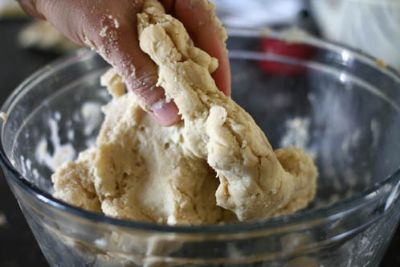
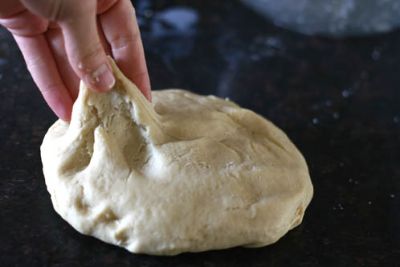
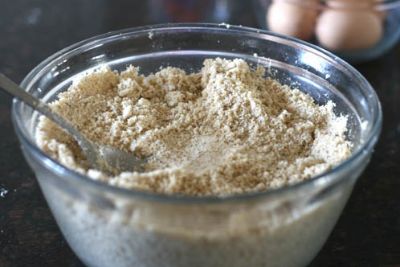
1. In a large bowl, sift together sugar, salt (about 1/3 teaspoon) and flour. Add olive oil. Add water to the flour mixture (a small amount at a time) mixing it and kneading dough until it's even, soft and doesn't stick to your hands. Add a little more flour if the dough is sticky, or water if it's stiff. Place the dough aside and prepare the filling.
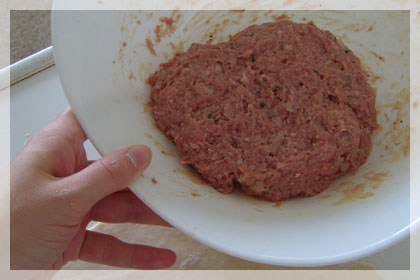
2. In a separate bowl, mix together ground beef, finely chopped onion and parsley. Season the mixture with salt and pepper and stir in water.
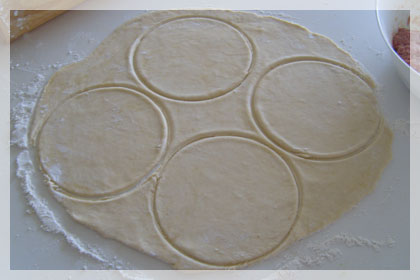
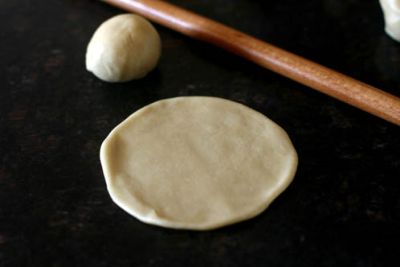
3. On a lightly floured surface, roll the dough until it is about 1/10-1/8 inch (2.5-3mm) thick. Cut circles using a small tea plate. Gather the rest of the dough into a ball and roll again. Repeat until you used all the dough.
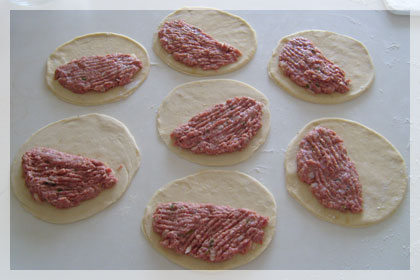
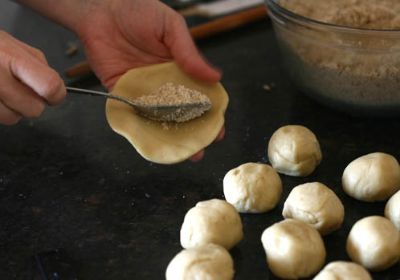
4. Place about 2 tablespoons of the filling on one side of the circle, leaving 1/2 inch (about 1cm) space at the edges.
5. Fold the other half of the circle over and pinch the edges firmly together using your fingers.
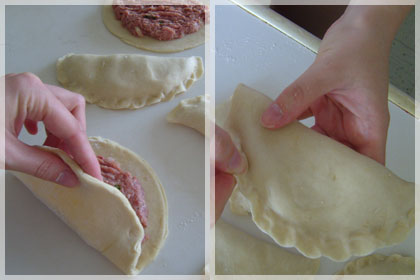
6. Make sure there is no air inside chebureki and the edges are closed tightly.

7. In a large skillet, heat the oil for deep frying (it should cover about 1/2 of a cheburek), reduce heat to medium and place 3 or 4 chebureki into oil (depending on the size of your skillet). Fry chebureki on both sides until nicely and evenly brown (about 5 minutes per each side).
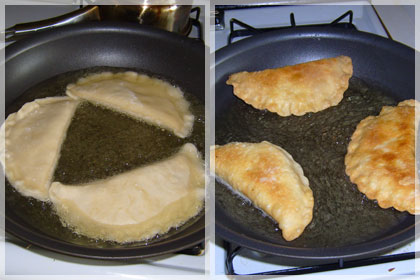
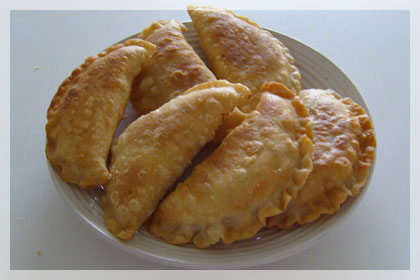
8. Drain on paper towels, let rest for a few minutes. Serve while still hot.

3. Dushbara
Ingredients
- 1 ½ lbs ground beef
- 3 large onions, finely chopped + 2 large onions, finely chopped
- 2 cups all-purpose flour
- 1 can chickpeas
- 1 ¾ lbs tomatoes, finely chopped
- 1 bunch cilantro, finely chopped
- 2 eggs
- ½ cup neutral oil
- ½ tsp ground pepper
- salt
- cilantro, to garnish
Directions
- Soak the chickpeas in water for 3-4 hours, until the skins can easily be removed.
2. To make the dough, place the flour into a dish, form a well in the middle, and add the eggs, 1 tsp salt, and enough water that the mix can stick together. Knead the dough into a ball, cover with a towel, and let rise for 30 minutes
3. Roll out the dough until it’s paper-thin. Cut dough into 2 inch squares.
4. Heat 2 Tbsp oil and sauté the 3 onions for 4-5 minutes. Add the ground beef and season with salt and pepper. Cook for a further 3-5 minutes, then transfer into a shallow dish to cool.
5. To form the dumplings, place ½ tsp of filling in the center of a dough square, then fold the strip into a triangle. Pinch the long edges together. Fold the unfilled end of the strip upward and wrap the filled end around your index finger — similar to forming a Tortellini Connect the edges and pinch together to seal.
6. Make the sauce. Start by sautéing onions in the remaining oil for 5-6 minutes. Add 7 cups water and bring to a boil. Add the skinned chickpeas and cook for 20-30 minutes.
7. Add the tomatoes, salt, and ¼ tsp ground pepper, then lower the heat and simmer for hour.
8. Cook your dumplings in boiling, salted water until they float to the surface.
9. To serve, transfer the cooked dumplings into a dish, top with the sauce, and garnish with cilantro.

4. Qutab
INGREDIENTS
-
- 5 cups (625g) flour
- 1¾ cups (420ml) water
- 2 teaspoons salt
- 2 tablespoons oil
- 500g (17.6oz) green onion
- 1 bunch parsley
- 1 bunch coriander
- 1/2 bunch dill
- 300g (10.5oz) hard cheese of your choice
- 1 teaspoon salt
- 1 teaspoon pepper
- Butter for brushing
1. In a large bowl combine flour, salt and oil. Add water and mix until dough is formed. Add more water if the dough is to dry or more flour if to sticky. Knead the dough for 4-5 minutes, until soft and elastic. Cover the dough and let rest while you make the filling.
2. Roughly chop and green onion and herbs. Place in a large bowl. Crumble or grate in the cheese, season with salt and pepper and mix well.
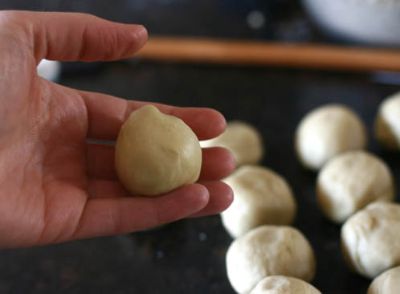
3. Divide the dough into 12 equal pieces and shape them into balls. roll each ball into circle 20-22cm (7-8-inch) in diameter.
4. Fill half of the circle with the filling, leaving little bit space at the edges. Fold the dough and press with your fingers. Cut the edges with a knife or a pizza cutter. Repeat with remaining dough.
5. Heat a dry large pan or cast iron skillet over medium heat, place the flat breads and cook about 3 minutes on each sides or until golden brown.
6. Remove from the pan and immediately brush with butter.

5. Kurze
Prep time: 1 hour
Cook time: 10 minutes per batch
Yield: 6–8 servings
Ingredients
- Filling
- 1 pound ground meat of your choice (traditionally lamb, but can use beef or turkey)
- 1 teaspoon salt
- ½ teaspoon black pepper
- 1-2 onions, finely chopped (based on your preference)
- Dough
- 2½ cups all-purpose flour, plus more for kneading
- 1 teaspoon salt
- 1 large egg
- 1 cup water, plus more if needed
- Optional: Olive oil (or canola oil), for frying
- Dipping Sauce
- ¾ cup red vine vinegar
- 3 cloves garlic, minced
Preparation
- Filling: Prepare the meat filling first. Mix ground meat, salt, pepper and onions together in a large mixing bowl. Cover with wet towel or plastic wrap and set aside. For extra juiciness, you can put the bowl in the fridge to let the mixture sit for a few hours.
- Dough: Put 2½ cups all-purpose flour in a large mixing bowl. With your hand or a spoon, create a well in the middle of the pile of flour inside your bowl. Add in salt and pepper. Then, crack the egg into it. Add in 1 cup of water and mix together with your hands until you have a mass of formed dough.
- Knead the dough in your bowl for several minutes, adding water, just a teaspoon or so at a time, if it gets too hard or adding some extra flour if it is feeling too sticky on your hands. After kneading for several minutes, form the dough into a smooth ball. Cover your bowl with a wet towel and set aside for 10 minutes.
- Shape: Next, roll out the dough. Prepare a clean surface on your kitchen counter or on a wooden rolling board. Dust it with fresh flour so that when you start rolling out your dough, it doesn’t stick.
- Take your ball of dough and flatten it down with your hand so it creates a rough circle. Sprinkle it with some flour so it doesn’t stick to the rolling pin as you go. Start rolling the dough from the center of the circle to the top, then to the bottom, and keep rolling across the surface of the circle distributing your grip on the pin so that it rolls across the dough evenly. Roll the pin in all angles, rolling up and down, then angle your body so you can roll side to side and diagonally.
- Repeat these movements and you should have a large circle of thin dough. If you do not yet have a thin circle of dough, continue rolling it out until it’s fairly thin. If this is your first time rolling dough, it is better to have it slightly thicker than too thin so that the kurze don’t break. (Refer to the photo in the main post to see approximately how thin the dough should look.)
- Then, take a cup or a glass with a smooth and even surface. Turn the cup upside and cut out circles from the dough. I like to start at the very edge of the dough and go around, gradually making my way to the center of the circle and taking any scraps of dough in between circles and forming them together into a small ball of dough.
- If this process takes you a long time, put a wet paper towel over your created circles so that they do not dry out. Once you have your dough circles ready, you can start stuffing and forming your kurze dumpling into its iconic shape. Make sure to bring out your meat filling if you had it sitting aside.
- Take one circle in your dominant hand (for me, it’s my right), and take a teaspoon of the meat filling and place it in the center of your circle. With the circle in your dominant hand, use your thumb and index finger to pinch the end of the dough to start your “braid.” Then pinch each side of the dumpling as you move to close it, alternative between the right and left sides and moving the dough into the center. With your less dominant hand, use your thumb to keep the filling in place so it doesn’t fall out as you start pinching the dough and use your other fingers as support for the bottom of the dumpling. (Refer to the short video at the bottom of this post for how to do it.) Make sure to cover the dumplings as you go so that they do not dry out. You can also freeze the raw dumplings and boil later.
- If you’re a beginner and this technique is too difficult for you, you can also opt to make half-moon shaped dumplings by bringing both ends of the circle together and pinching it shut. The taste is the same, just a different aesthetic.
- Boil: The easiest step is boiling the dumplings! Fill a large pot with water about ⅔ of the way, add in about a teaspoon salt and bring it to a boil over high heat. Once the water is boiling, turn it down to medium-high heat and make sure it is still bubbling. Gently drop the dumplings into the water. The dumplings will sink to the bottom and then start to come up as they become fully cooked in the heat.
- Keep doing this with many dumplings and make sure to stir with a large spoon. This can take up to 10 minutes, but is usually less. To be safe, I usually take out one dumpling and cut it open to see if the meat has fully cooked. Remove the dumplings using a large slotted spoon, and put them in a large, shallow bowl, but try to keep them separated so they do not stick together.
- Once you have successfully boiled all of the dumplings, you can stop here. The kurze is now fully cooked and you can enjoy them immediately. Just wait a few minutes—they’re hot!
- Fry: For the extra oily, crispy and fried version, continue to the last step: frying! Take out a large frying pan, and let it warm up over medium heat. Then add in enough olive oil (or canola oil, based on your preference) to cover the surface of your frying pan. Make sure to heat the oil a bit before adding in the dumplings or else they may stick to the surface of your pan. Once the oil is warm, keep the heat on medium, and add in the dumplings. Fry the first side until it is golden brown and crispy, then fry the other side. Remove from the pan with a spatula and continue until all kurze are crispy, golden and ready to eat. Arrange on a beautiful plate.
- Dip: The dipping sauce is optional, but is a traditional part of the kurze-eating experience. Combine vinegar and garlic. You can use less garlic if you prefer. We tend to have a very garlic-heavy cuisine, so we can handle it better than others.
- Dip your fried kurze dumpling into the garlicy vinegar dip, and taste!

6. Ingar Poli
Makes: 2 to 4 servings
Time: 30 minutes + 30 minutes soaking time
Ingredients
For the sauces:
2 ounces (⅓ cup) walnuts
2 teaspoons water
Kosher salt, to taste
½ cup dried sulfured apricots, soaked in hot water for 30 minutes
For the dough:
1 bunch chives, finely chopped (about ½ cup)
1 teaspoon kosher salt
2 large eggs, lightly beaten
1¼ cups all-purpose flour, plus more for dusting
Preparation
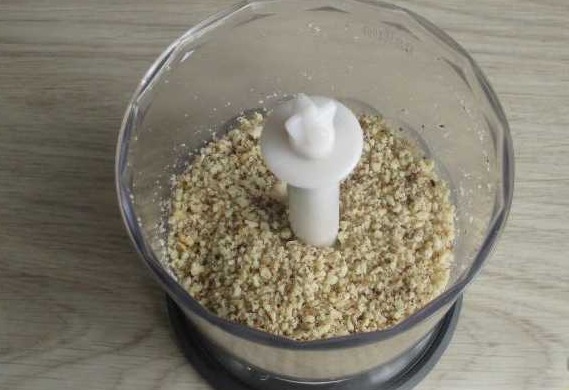
1. For the walnut sauce: Place the walnuts in a small food processor and pulse until finely ground. Transfer the ground nuts to a small serving bowl and mix with the 2 teaspoons of water until a thick paste forms. Season with salt to taste and set aside.
2. For the apricot sauce: Transfer the soaked apricots to a food processor and add about 3 tablespoons of the soaking liquid. Pulse until a smooth paste forms, adding more soaking liquid if needed. Transfer to a small serving bowl and set aside.
3. For the dough: Mix the chives and salt in a medium bowl and let stand for about 10 minutes to soften.
4. Add the eggs to the chives and mix until combined. Slowly whisk the flour into the egg mixture until a very soft dough forms.
5. Transfer the dough to a heavily floured work surface and generously dust the top of the dough with additional flour. Flatten the dough into an 6-inch square with your hands or a rolling pin. Gently flip the dough to keep it from sticking, flour it again, and flatten the dough into a ¼-inch-thick square. With a floured pizza cutter or sharp knife, cut the dough into long ½-inch-wide strips, and then cut the strips into ¾-inch-long rectangles on the opposite axis. Transfer the dumplings to a wax or parchment paper-lined baking sheet.
6. Cook the ingar poli: While making the dough, bring a large pot of generously salted water to a boil over medium-high heat. Gently slide the ingar poli into the water. Simmer 2 to 3 minutes until the dumplings float to the surface, then continue to cook 1 to 2 minutes more. Remove the dumplings with a slotted spoon to a serving dish.
7. Serve immediately, accompanied by the walnut and apricot sauces drizzled onto every bite.
Make ahead: The dough can be made ahead, flattened, cut, and placed on a wax or parchment paper-lined tray in the freezer until firm, then transferred to a sealed container or a resealable bag. Add the frozen ingar poli directly to the boiling water and continue to cook 2 to 3 minutes after they float to the surface. The apricot sauce can be made 1 to 2 days ahead and stored in a sealed container in the refrigerator. Remove the sauce from the refrigerator 30 minutes before serving, adding extra water to thin it if necessary.

7. Chudo
Makes: Two 12-inch stuffed flatbreads, 6 to 8 servings each
Time: 1 hour + 1½ hours for rising or overnight
Ingredients
For the dough:
1 pound (3⅓ cups) all-purpose flour, plus more for dusting
2 tablespoons canola oil
1 teaspoon active dry yeast
1 teaspoon sugar
1 teaspoon kosher salt
1½ to 1¾ cups lukewarm water
For the filling:
4 tablespoons unsalted butter (or canola oil for a parve or dairy-free version)
2 tablespoons canola oil
¼ teaspoon whole cumin seeds
2 pounds peeled and coarsely grated (about 8 cups) fresh pumpkin (or butternut squash if fresh pumpkin is unavailable)
3 ounces (⅔ cups) shelled walnuts, finely ground in a food processor
Kosher salt, to taste
Freshly ground black pepper, to taste
2 tablespoons unsalted butter, melted, for brushing (or canola oil for a parve version)
Preparation
1. Make the dough: Combine all the ingredients in a mixer bowl equipped with the hook attachment. Mix until the dough comes together and pulls away from the sides of the bowl, 4 to 5 minutes. Cover the bowl with plastic wrap or a damp towel and place in a warm place until the dough has doubled in size, 1½ to 2 hours.
2. Meanwhile, make the filling: Melt the butter and oil in a large skillet over medium-high heat. Add the cumin seeds and toast until fragrant, about 1 minute. Add the grated pumpkin, spread evenly in the pan and sauté, stirring occasionally, until the liquid evaporates, 5 to 7 minutes. Add the ground walnuts, salt and pepper to taste, and mix well. Transfer to a bowl, loosely cover and refrigerate until cool, about 1 hour.
3. To make the flatbreads: Preheat the oven to its maximum temperature, 500°F to 520°F, with a pizza stone or upside-down sheet pan placed on a rack in the lower third of the oven to heat. Move the risen dough to a large, lightly floured work surface. Knead just to form into a ball,1 to 2 times. Divide the dough in half with a dough cutter. Keep one half covered while working with the other half.
4. Divide one half of the dough into one-third and two-thirds segments. Pat the two-thirds piece of dough into a round and roll out as thinly as possible without tearing, dusting generously with more flour as needed. The dough should be especially thin at the edges, to avoid a thick seam where the two pieces of dough are joined around the filling. Carefully move the larger dough round onto a large sheet of parchment paper and set aside. Form the smaller third into a round on the floured surface and roll out as thinly as possible.
5. Spread half of the pumpkin filling evenly over the larger circle, leaving a wide rim (about 1 to 1½ inches) around the edge. Place the smaller dough round on top of the filling (it will not cover it completely) and flatten gently with your fingers to push out air bubbles.
6. Begin crimping the two edges of the dough rounds together in a classic Kavkazi braid pattern by bringing the inner round towards the outer with your index finger and the outer round towards the inner with your thumb, and lightly pinching them together. With your other hand, continue to pull the outer circle of dough inwards and turn the parchment as you advance, creating a tightly sealed seam around the filling.
7. Carefully slide the parchment with the filled flatbread onto the baking stone or sheet in the oven. Bake until puffed and golden brown, 8 to 10 minutes. Remove and immediately brush with the melted butter or oil. Let cool slightly before cutting into wedges.
8. Meanwhile, repeat steps 4 through 7 with the remaining half of the dough and filling.
Alternative folding technique: Starting from step 3, roll out each half of the dough into a large, thin round. Divide the filling between the rounds, leaving a wide 2- to 3-inch rim on each. Pull the edges of the dough towards the center of each round over the filling and pinch firmly to seal. Flip the filled flatbreads over seam-side down onto pieces of parchment paper and bake as instructed.
Make ahead: The dough can be made the night before, and transferred to the refrigerator immediately to rise slowly overnight. The filling can also be made the night before and chilled in the refrigerator, then allowed to come to room temperature 30 minutes before making the flatbread.
Chef’s Notes
The pumpkin and walnut filling is unique, and can be made dairy-free, parve and vegan when omitting the butter.
Other fillings include:
-
Ground beef or lamb with various chopped green herbs (This version is done with no top dough round, just the bottom dough round and the meat mixture on top, like pizza or lahmajun): 1 ¾ pounds ground beef or lamb, ¼ bunch chopped cilantro, 1 grated plum tomato, kosher salt and pepper, to taste. Mix the filling ingredients and divide between each thinly rolled dough half, leaving a wide 2- to 2 ½-inch rim. Fold the edges up over the filling as you would a galette, to keep the juices in.
-
Mixed greens: 1 package fresh spinach, 1 bunch celery leaves, ¼ bunch each of parsley, cilantro, dill and mint. Chop the greens and herbs, mix, and season with kosher salt and freshly ground black pepper for a parve version, or with ⅔ pound Tvoro cheese or Bulgarian feta for the dairy version. Roll and fill the dough as directed.

8. Mountain Jew Omelet
Ingredients
- For the poached chicken:
- 2 chicken legs
- 1 onion, coarsely chopped
- 1 carrot, coarsely chopped
- 1 celery stalk, coarsely chopped
- 2 bay leaves
- 1 teaspoon sea salt
- 1 teaspoon black peppercorns
- For the omelet:
- 2 tablespoons butter or oil
- 2 onions, sliced
- 1 teaspoon ground turmeric
- 1 teaspoon paprika
- 7 ounces cooked and peeled chestnuts, halved
- 4 eggs
- Sea salt and freshly ground black pepper
- Put the chicken legs in a pan with all the aromatics and cover with cold water. Bring to a boil, cover the pan, and turn the heat down to simmer for 25 to 30 minutes until cooked through. Drain the chicken and reserve the broth. Remove the skin and bones, and shred the meat.
- For the khoyagusht, heat a frying pan and add the butter or oil and any fat from the top of the broth. Cook the onions until softened, then add a ladleful of the broth from the chicken. Continue cooking until the liquid has evaporated and the onions are light golden. Season with salt and pepper and add the turmeric and paprika.
- Add the shredded chicken and the chestnuts to the pan, and stir everything together. Moisten with another small ladleful of the chicken broth. Cover with a lid and simmer for 10 minutes for the flavors to meld.
- Heat the broiler. Lightly beat the eggs with salt and pepper. Pour over the top of the meat and use a spoon to make holes in the meat, encouraging the egg into the gaps. Put under the hot broiler just to set the eggs and slightly brown the top. (You may need to protect the handle of the pan.) Leave the khoyagusht to sit in the pan for 5 minutes before turning onto a plate and cutting into wedges to serve.

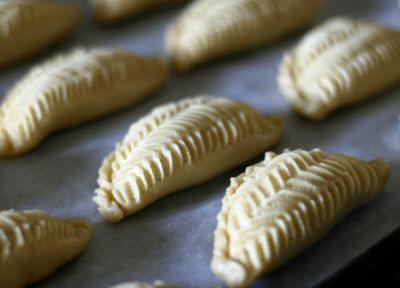
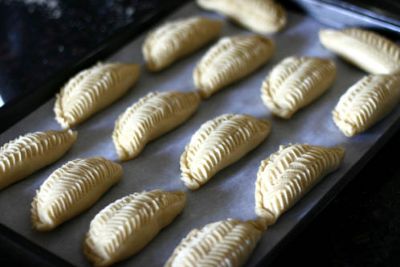
9. Azerbaijani shekerbura
Makes 36 shekerbura pastries
For the Dough:
1 kg / 2.2 pounds first grade wheat flour (white only) + 1 tablespoon (for step 3)
400 g / 14 oz unsalted butter, cut into large chunks
5 egg yolks
250 g / 9 oz sour cream
1/4 teaspoon salt
1/2 teaspoon vanilla powder (optional)
1/2 teaspoon dry yeast
1 tablespoon sugar
1/2 cup / 125 ml lukewarm milk
For the Filling:
700 g / 1.5 pounds skinned hazelnuts, or almonds or walnuts (See recipe for how to skin if readily skinned nuts are not available)
700 g / 1.5 pounds granulated sugar
2 teaspoon, or to taste, ground cardamom
You’ll also need: mixing bowls, baking sheets, and a maggash (tweezers)
How to prepare:
1. Prepare the dough. Put the flour and the butter in a large mixing bowl. Using your hands, rub them together until you obtain fine crumbs. Make sure there are no large crumbs left.
2. In a small bowl, using a spoon, mix the eggs yolks, sour cream, salt and vanilla powder.
3. In another small bowl, put the yeast, 1 tablespoon flour, 1 tablespoon sugar. Fill it with 1/4 cup of lukewarm milk. Let stand for about 2 minutes.
4. Add the egg-sour cream mixture , the yeast mixture , to the flour-butter mixture.
5. Using your hands, mix the ingredients until fully incorporated and a rough and inconsistent dough is obtained. Transfer the dough to your work surface. Put the remaining 1/4 cup of lukewarm milk in a separate bowl. Constantly wetting your hands with milk, knead the dough for a few minutes to make it smooth.
6. Shape the dough into a ball. Put it back in the bowl, cover with plastic wrap and leave aside to rest for about 30 minutes.
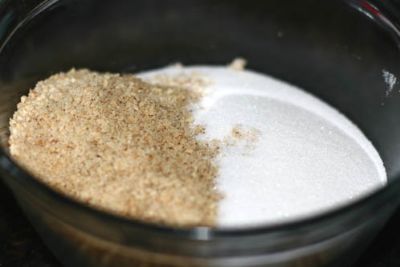
7. In the meantime, prepare the filling. If you are using already skinned nuts, grind them finely in a food processor. In a mixing bowl, combing the ground nuts with sugar. Add the ground cardamom and vanilla powder. Mix until fully incorporated.
To skin hazelnuts and walnuts at home: Place raw hazelnuts in a large frying pan, and roast over medium heat, stirring frequently, until the skins crack and begin to flake off, about 10 minutes. Take care not to burn the nuts. Working with small batches of nuts at a time, place them them on a kitchen cloth and rub with it to remove the skins. Most of the skins will come off although some will still cling to the nut (especially on walnuts). Do not worry, a little skin will not be that visible in the filling.
To skin almonds at home: Put the almonds in a pot and pour boiling water over them to barely cover their tops. Let the almonds sit in the water for about 2 minutes (do not keep them there for too long, or they will lose their crispiness and will be too soft). Drain off the water, pat dry the nuts and slip the skins off by squeezing the almonds between your thumb and fingers.
8. Divide the dough into 36 balls, each weighing 50 g.
9. Work with one ball at a time, and cover the rest. Roll each ball into a 4 inch (10 cm) circle.
10. Place the circle in the palm of your hand, slightly folded, and put 2 tablespoons of the filling in the center.
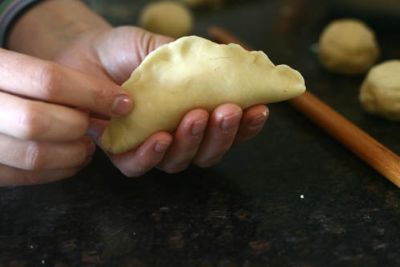
11. Starting at one end, begin sealing the left and right edges towards the center to obtain a half-moon shape. Sealed shekerbura must be somewhat chubby from the filling and never flat.
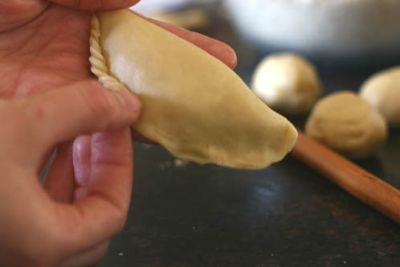
12. Using your thumb and index finger, start pinching and twisting the dough along the seal to decorate the edges.
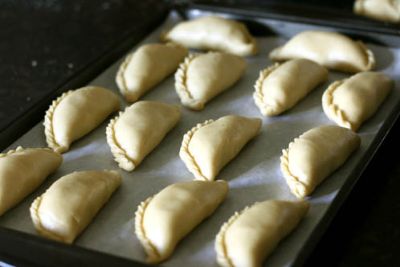
13. Arrange the pastry on a baking sheet, lined with parchment (baking) paper. Continue working with the rest of the dough balls, arranging them on the baking sheet as you are finished decorating their edges.
14. Now decorate the tops. Holding a pastry in one hand, and a maggash (tweezers) in the other, pinch the dough with the maggash at an angle and slightly lift it upward (see the picture below). Continue until you obtain a row of pattern. Create similar rows, each at an angle to the next one, until the entire surface is decorated.
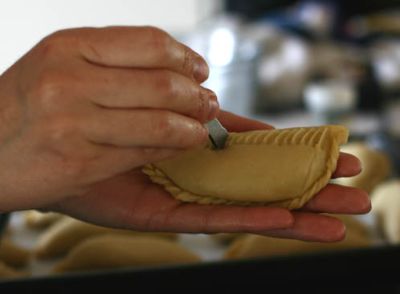
You finished pattern should look like in the photo below.
If maggash is not available, leave the top of shekerbura plain, without any patterns.
This is how shekerbura pastries look before they go in the oven.
15. Bake on the middle rack of the oven preheated to 175C (350F) for 15-20 minutes, or until the edges just begin to change their color and the bottom is light brown. Take care not to overbake the pastries – their tops should be light color when baked. If you did not decorate your pastries with the tweezers, coat them with powdered sugar once they cool off.

10. Tenbel Pakhlava
Ingredients
For the dough
- 4 cups all-purpose flour
- 1 cup unsalted butter , cut into small pieces
- 1 cup sour cream
- 1 teaspoon baking soda
- 2 egg yolks
For the filling
- 2 cups sugar
- 4 egg whites
- 20 oz. walnuts , ground coarsely
For the decoration
- 1 egg yolk , beaten
- Whole shelled walnuts
Instructions
-
In the bowl of a stand mixer, beat the flour and butter.
-
In a separate bowl, mix the sour cream and baking soda and incorporate to butter and flour mixture.
-
Stir in the egg yolks one by one. Mix and knead briefly until smooth and incorporated.
-
Divide dough into 3 equal pieces. Form each dough into a thick circle.
-
Wrap each circle in plastic wrap and refrigerate for 3 hours.
-
Beat the egg whites and sugar for 3 minutes at medium speed. Add the ground walnuts and stir with a wooden spoon to mix.
-
Grease an 8x12 inch (20x30cm) rectangular pan. Preheat oven to 350F/180C.
-
Dust the work surface with flour. Using a rolling pin, roll the first piece of dough to the dimension of the pan and a thickness of ⅛ inch (3mm).
-
Place the dough at the bottom of pan and press the bottom and the sides. Spread half of the nut filling on top of the first layer of dough.
-
Spread the second dough in the same manner and place it above the nut filling. Spread the remaining half of the filling over the second layer of dough.
-
Place the third piece of dough in the same manner as the first two, by covering the second layer of nuts. Press lightly on the top and on all sides to seal. Brush the top with the beaten egg yolk.
-
Using a large, sharp knife, carefully cut the pakhlava diagonally with a sharp blade all the way to the bottom of the cake to precut each slice.
-
Place a whole shelled walnut on top of each slice. Press lightly with the palm of your hand over the entire surface of the baklava.
-
Bake for 40 minutes or until the pakhlava is golden brown.
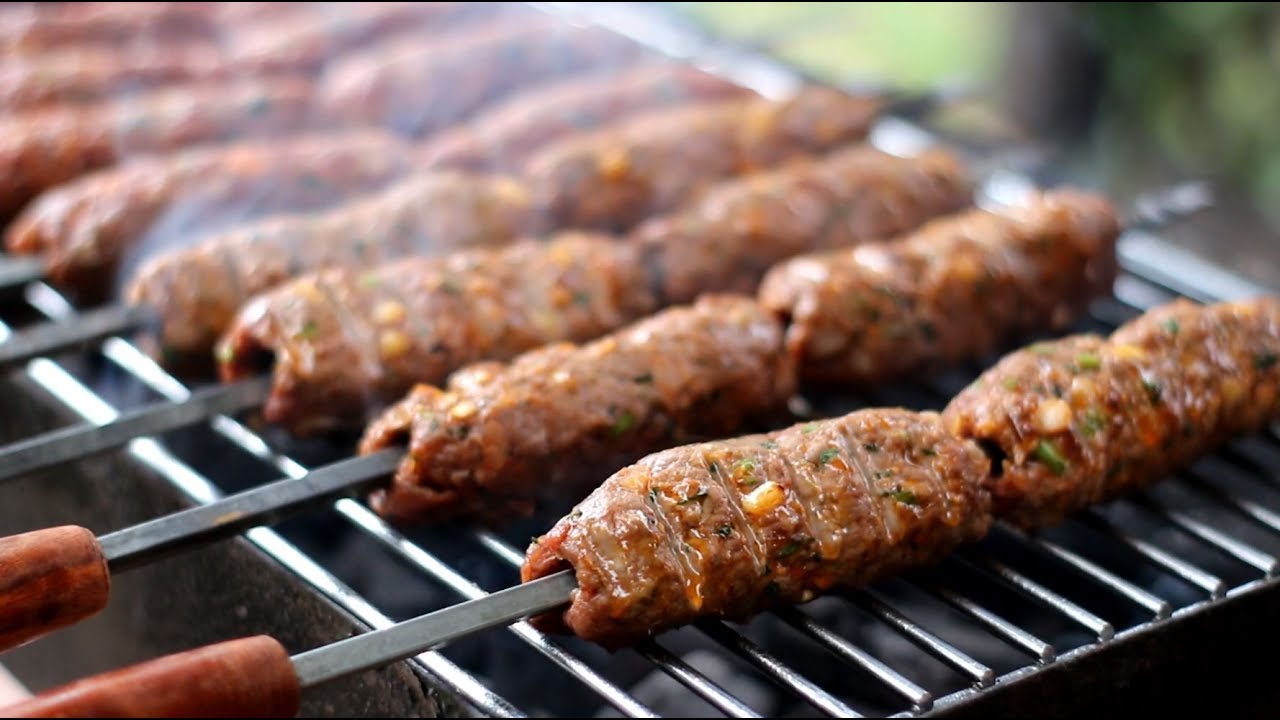
11. Lula Kebab
Ingredients
- 3 pounds ground lamb or sirloin
- 1 large yellow onion, very finely chopped (about 2 cups)
- ¼ cup finely chopped flat-leaf parsley, plus more for garnish
- 1 tablespoon finely chopped fresh mint leaves
- 1 large egg
- 2 teaspoons ground cumin
- 1 tablespoon paprika
- ½ teaspoon garlic powder
- 2 teaspoons kosher salt
- 1 teaspoon freshly ground black pepper
- 2 tablespoons tomato paste
- Juice of 1/2 lemon
Directions
Instructions
- Step 1
Line a baking sheet with parchment. Using your hands, mix all ingredients together in a large bowl just until combined (over mixing may toughen the meat).
- Step 2
Gently squeeze meat around 10-in. metal skewers to form log-shaped kebabs, each about 8 in. long. Put kebabs on baking sheet. Cover sheet with plastic wrap and, if you have time, chill 30 minutes to let flavors meld and firm up meat.
- Step 3
Prepare a gas or charcoal grill for high heat (450° to 550°; you can hold your hand 5 in. above cooking grate only 2 to 4 seconds) and grill kebabs, turning twice, until grill marks appear and meat feels firm, 8 minutes total. Sprinkle with parsley.
- Step 4
Make ahead: Make kebabs through step 2 and chill up to 1 day ahead.
- Step 5
Note: Nutritional analysis is per serving.
Nutrition Facts
Per Serving:
326 calories; calories from fat 58%; protein 27g; fat 21g; saturated fat 8.7g; carbohydrates 5g; fiber 0.9g; sodium 383mg; cholesterol 125mg.

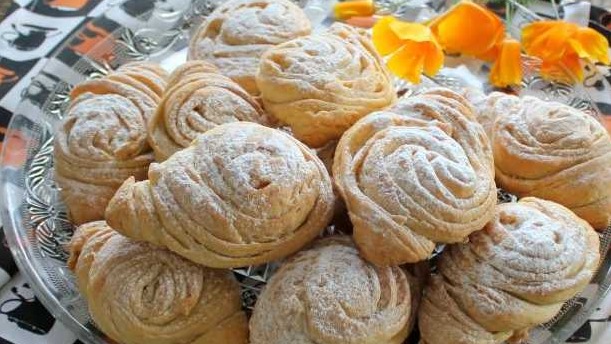
12. Badambura
Ingredients
For the dough:
- Flour - 2.5-3 cups
- Water or milk - 100 ml
- Butter - 50 g
- Yolks - 2 pcs.
- Dry yeast - 1 teaspoon
- Sugar - 1-2 teaspoon scoops
- Salt - 1 pinch
For filling:
- Nuts (walnuts) - 100 g
- Sugar - 2-2.5 tbsp
- Spices (cardamom, vanilla sugar) - 1-2 teaspoon
- Butter for greasing the dough - 50 g
- Sugar for serving - to taste
Badambura
Directions
- For the filling, you need to chop the nuts, for example, using a blender or a meat grinder. (Badambura is traditionally made with almonds; walnuts are used in this recipe.)
For the filling, you need to chop the nuts, for example, using a blender or a meat grinder
- Then mix the nut mass with sugar and spices (here, cardamom and vanilla sugar are used as spices).
- For the dough, melt the butter, combine it with warm milk, sugar, salt and egg yolks.
- Add flour combined with dry active yeast in portions.
- Stir the ingredients together with a spatula or just a spoon.
- When the ingredients grab together, knead the dough by hand.
- Leave the yeast dough to rise, covering the dishes with it from the surface drying out.
- Melt a serving of butter for greasing the dough, for example in the microwave, on medium heat for one minute.
- Divide the finished dough into eight pieces.
- Roll each piece of dough thinly and brush with butter.
- Place all layers of dough on top of each other.
- Then roll the dough into a roll and cut it across into pieces, about 1.5-2 cm wide.
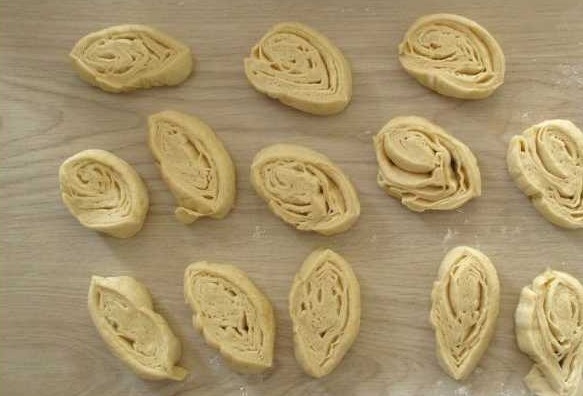
-
Then roll the dough into a roll and cut it across into pieces, about 1.5-2 cm wide
- Slightly flatten each roll of dough in the middle and place the nut filling in the resulting depression - 1.5-2 teaspoon.
- Pinch the edges of the dough, making it look like a pie with filling.
- Place the workpieces with the seam (pinch) down on a greased and / or covered baking sheet with baking paper.
If you want the badambura to be softer and more puffy, then let the blanks move for a few minutes. True, they can lose their shape a little - "part way". - Bake badambura in the oven at 170-175 degrees for about 15 minutes. It is advisable not to let the baked goods brown too much.

Bake badambura in the oven at 170-175 degrees for about 15 minutes
- Sprinkle the badambura with icing sugar when serving.
Enjoy your tea!

13. Potato Piroshki
Ingredients for the Dough:
1 1/2 Tbsp oil
15 oz luke warm water
4 cups + 2 Tbsp all-purpose flour (divided)
1 tsp salt
1 Tbsp Active Dry Yeast
1/2 Tbsp sugar (omit sugar if doing meat or potato filling)
Ingredients for Filling:
7 to 8 medium potatoes, peeled and cut into 1/2″ thick chunks
3 Tbsp butter, melted for potatoes
1/2 medium onion
1 Tbsp butter for onions
Ingredients for Garlic Dip – “Vmochanka”
(this is for one serving, so increase it accordingly):
1/4 cup warm water
1 Tbsp olive oil (you can use any kind of oil really)
1 garlic clove, pressed
1/2 tsp salt
Mix all dip ingredients together; that’s all there is to it!
Other Ingredients:
Enough canola oil to go half-way up the side of the piroshky when frying.
Lots of extra flour to dust the cutting board (I probably use at least 1/2 cup extra flour)
How to make potato filling:
1. Fill a medium pot with sliced potatoes and add water until potatoes are almost covered. Add salt. Bring to a boil over high heat, then cover and reduce heat to a light boil. Boil 18-20 minutes, or until a knife easily pierces potatoes.

2. Mash potatoes, then add melted butter.

3. Saute diced onion and 1 Tbsp butter until onion is browned.

4. Mix onions into potatoes and let the mix cool to room temp.

How to make the Dough:
1. The easiest way to do this is in a bread maker. If you have one, set it to the dough setting and add the ingredients in the following order: Oil, water, 2 cups flour, salt, sugar, 2 cups + 2 Tbsp flour*, yeast.
A bread maker will do the following: mix, let dough rise, mix again and let the dough rise (It takes about 1 to 1 1/2 hours) and once it’s done in the bread maker, its ready to go.
*to get an exact flour measurement, use a dry ingredients measuring cup and scrape off the top with the back of a butter knife.
You can also make this dough using a stand mixer with a dough hook on speed 2(mix all the ingredients together, let rise 3o min in a warm spot, mix again and then let it rise again in a warm place another 45 min (no warmer than 100˚F or you will kill your yeast). (It should be 2 to 2 1/2 times in volume.

2. Put the finished dough onto a well floured cutting board, dust the dough with flour and with well-floured hands, shape it into a large log.
It will rise more as you make the piroshki

3. Cut off pieces one at a time about 3/4″ thick.

4. Place the piece of dough over your well-floured hand (dough will be sticky) and shape it into a 3″ to 4″ circle using your hands. Do not put flour on the side where you are going to put the potatoes, otherwise the sides won’t seal.

5. Place 1 heaping Tbsp of potato filling in the center.Cover the potatoes with the sides of the dough and pinch the ends together with your fingers to seal the dough together. If necessary, flatten the pirojki slightly to make them a more uniform size.

6. Heat oil in a large, deep, heavy-bottomed pan. There should be enough oil to cover the pirojki half-way up the side.

7. Place them in the hot oil (about 330 ˚ F) and fry until deep golden brown on each side. Sometimes they puff up a lot on one side so you may end up with a third side that needs to be fried. Place on paper towels to cool and enjoy!
To make the garlic dipping sauce; just mix all the sauce ingredients together. Easy.